Where to Put a Shipping Label and How to Avoid Label Problems
A shipping label is a small piece of paper doing a big job. Every scanner, sorting machine and driver that touches your package depends on reading it quickly and correctly. When a label is placed on a seam, wrinkled over a corner or sitting next to an old barcode, packages get misrouted, delayed or sent back, and sometimes you are charged extra to fix the problem.
This guide shows you exactly where to put a shipping label, how to attach it so it survives the trip, how to deal with reused boxes and odd shapes, and the label mistakes that cause the most trouble. It takes only a minute per package to get right, and it prevents a surprising number of headaches.
Why label placement matters
Modern carrier networks rely heavily on automated scanning. Packages move along conveyor belts past cameras and scanners that read barcodes from above and from the sides. A label that is flat, fully visible and on a large surface can be read at speed. A label that is folded, partly hidden or competing with another barcode may fail to scan, which can send the package to manual handling or the wrong place.
Placement also affects durability. Labels near edges and seams are more likely to peel, tear or get scuffed as boxes rub against each other in trucks and bins.
Where to put a shipping label on a box
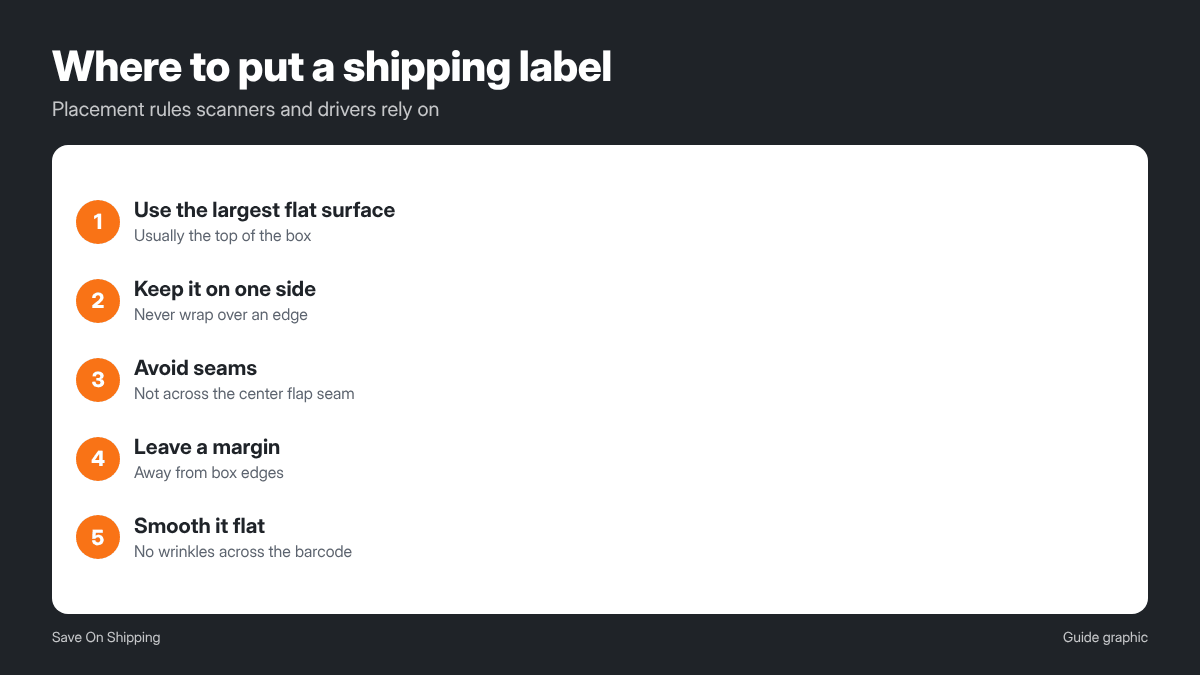
Follow these placement rules for a standard box:
- Use the largest flat surface. For most boxes, that is the top. This is the side scanners and handlers expect to read.
- Keep it fully on one side. Never wrap a label over an edge or corner. A label that bends is hard to scan.
- Stay away from seams. Do not place the label across the center seam where the flaps meet, or over taped seams if you can avoid it.
- Leave some margin. Keep the label a little away from the box edges so it is less likely to get scuffed or peeled.
- Keep it level and flat. Smooth it from the center outward to remove bubbles and wrinkles.
Long boxes and tubes
For mailing tubes and long, narrow boxes, place the label lengthwise along the tube or box so the barcode is not curved around a tight radius. On a tube, you can wrap clear tape around the tube to hold the label down, keeping the barcode as flat as possible.
Poly mailers and envelopes
Place the label on the flattest part of the front, away from the adhesive flap and folds. Smooth the mailer flat before applying so the label does not wrinkle when the bag shifts.
How to attach the label so it stays on
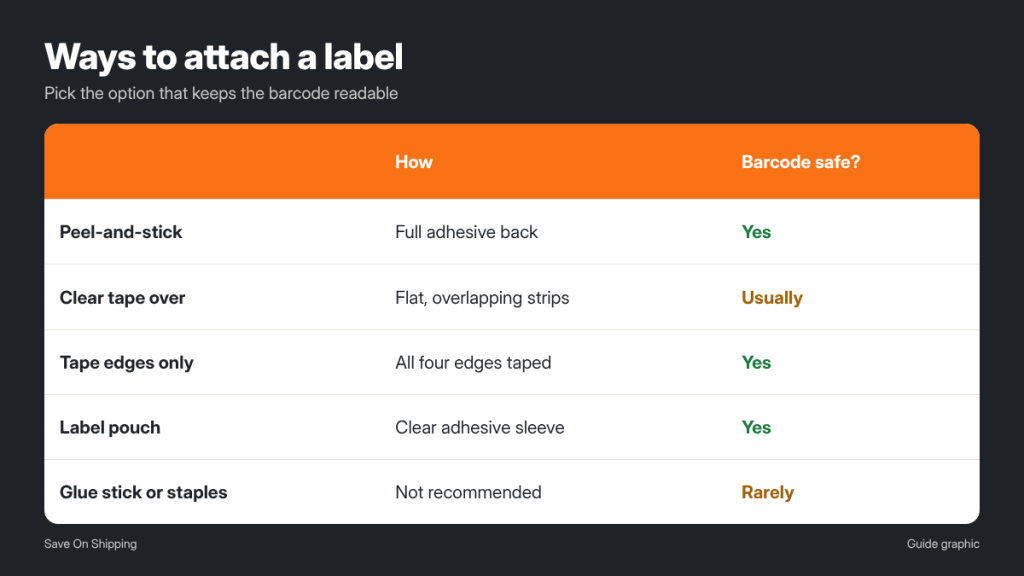
Peel-and-stick labels are the easiest option because the adhesive covers the whole back. If you print on plain paper, you have a few choices:
- Clear packing tape: cover the label with clear tape, laid flat in overlapping strips. Avoid wrinkles, bubbles and glossy glare directly over the barcode, which can make scanning harder.
- Tape the edges only: tape all four edges so the label cannot lift, leaving the barcode uncovered.
- A label pouch: slip the label into an adhesive clear pouch, which protects it from moisture and scuffs.
Avoid using glue sticks alone, staples or string to attach a label. These fail easily in transit.
Reused boxes: deal with old labels first
Reusing boxes saves money, but old labels are one of the most common causes of misrouted packages. A scanner may read the old barcode instead of yours and send the package back to wherever it went last time.
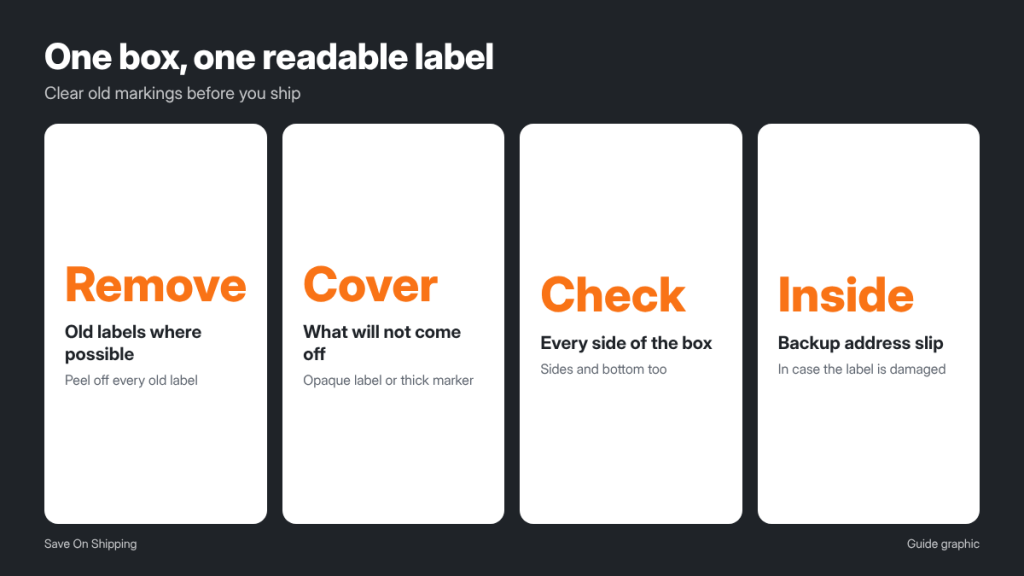
- Remove old labels completely when you can.
- Cover what you cannot remove with a solid, opaque label or thick marker so no barcode, QR code or address remains readable.
- Black out old tracking numbers and carrier logos as well as barcodes.
- Check every side. Old labels are often on the sides or bottom, not just the top.
- Remove old hazard or battery markings that do not apply to your current shipment, since they can trigger unnecessary handling.
The goal is simple: when your box goes through a scanner, there should be exactly one readable label on it, yours.
What should be on the label
Most carrier-generated labels include everything needed automatically, but it is worth checking before you attach it:
- The recipient’s full name and complete address, including suite, apartment or unit number.
- Your return address.
- The barcode and tracking number, printed clearly with no smudges or faded areas.
- The correct service, matching what you paid for.
If your printer is low on ink or toner, reprint the label. A faint barcode may not scan, even if you can read it with your own eyes.
Add a backup label inside the box
Labels can be torn or damaged in transit, even when you do everything right. Put a slip of paper inside the box, on top of the contents, with the recipient’s address and your return address. If the outside label is lost, carriers can open or inspect the package to find a way to deliver or return it.
Handling labels and special markings
Besides the shipping label, you may want to add other markings. Use them carefully so they help rather than confuse.
- Fragile and orientation labels: “Fragile” and “This Side Up” stickers can be added, but place them away from the shipping label and barcode. Automated systems do not read them, so they never replace good packing.
- Hazard markings: if you ship anything regulated, such as certain batteries, the carrier may require specific labels. Follow the carrier’s instructions exactly, and remove old markings that do not apply.
- Customer references: businesses often print an order number on the label. This is useful, but keep it within the label area rather than adding extra stickers.
- Return labels: if you include a return label for the customer, place it inside the box, never on the outside next to the outgoing label.
A clean outer box with one shipping label and only the markings you truly need is the easiest package for any carrier to handle correctly.
Common label mistakes and how to fix them
- Label wrapped over an edge. Move it to a single flat side, or use a larger box face.
- Two labels on one box. Remove or cover the extra one completely.
- Wrinkled tape over the barcode. Reapply with smooth, flat tape or use a pouch.
- Label on the bottom of the box. Move it to the top so it is visible as the box sits on a belt.
- Faded or smeared print. Reprint with fresh ink or a thermal label printer.
- Using the same label twice. Every package needs its own label. Reusing a label on a second package can cause one to be lost and may result in extra charges.
- Shrinking the label to fit. Print at the size the carrier specifies. Scaling a label down can make the barcode unreadable.
A 30-second label checklist
- Old labels and barcodes removed or fully covered.
- New label printed clearly at full size.
- Placed on the top, fully on one flat side, away from seams and edges.
- Smoothed flat with no wrinkles across the barcode.
- Edges secured with tape or placed in a pouch.
- Backup address slip inside the box.
Frequently asked questions
Can I put the shipping label on the side of the box?
It is better to use the top, the largest flat surface. If the top is too small or covered in seams, use the next largest flat side and keep the label fully on that side.
Is it okay to tape over the barcode?
Clear tape laid flat is usually fine. Avoid wrinkles, bubbles and heavy glare, and never use colored or opaque tape over the barcode.
Can I handwrite the address next to the label?
It is not necessary and can confuse readers if it differs from the label. If you want a backup, put it inside the box instead.
What if my label gets wet or damaged before drop-off?
Reprint it. Most carriers allow you to reprint the same label as long as only one copy ends up on the package.
No printer at home?
Bring your package and label code to The Postal Spot, a FedEx Authorized ShipCenter in Houston, where staff can print the label and attach it correctly before shipping.